All about PSPA

The Professional School Photographers Association (PSPA) has been defining the industry standard for photo CD’s in the yearbook industry for many years.  Obviously, our program is built to work based on this standard, so we’re dedicating today’s blog post to all things PSPA.

For a look at the PSPA website, click here.

We have posted all of our PSPA related help documents and tech notes to our support site.  Check them out here!  This page includes instructions for importing PSPA and non PSPA CD’s into our Yearbooks program as well.


A Shout Out to Bill Nye

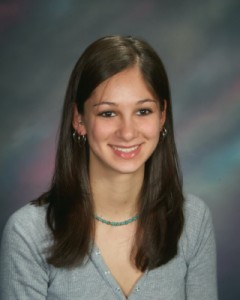
William NyeLast week, Bill Nye, best known as “the science guy” turned 57!  What better way for us to give a shout out to Bill than to post his old yearbook photo in our blog!

Nye began his professional entertainment career as an actor on a local sketch comedy television show in Seattle,Washington Almost Live!; he attempted to correct the show host’s pronunciation of “gigawatt” as “jigowatt.” The host responded, “Who do you think you are—Bill Nye the Science Guy?” and thus his on screen persona was born.

Soon after, Nye hosted an educational television program, Bill Nye the Science Guy, from 1993 to 1998. Each of the 100 episodes aimed to teach a specific topic in science to a preteen audience, yet it garnered a wide adult audience as well.  With it’s comedic overtones, the show became very popular as a teaching aid in schools.  Nye continues to educate children and adult audiences today.

Thanks Bill!  You are one of the greats!

Keeping up with the times – QR Codes in Yearbooks!

Our team was inspired this morning, after reading a story about a Texas high school bringing their yearbooks a leap forward using modern technology.

The changes sparked by new Apple mobile devices on campuses can already be seen in a long-cherished print product, the McAllen High School Yearbook. The first page of the 2012 edition sports a QR code — a kind of barcode that can be scanned with a cellphone, often to pick up website URLs.

Each QR code in the yearbook takes readers to a video of a different club or sports team, all shot with iPads distributed last year.

Check out the full story here!

So, interested in using this innovative idea for your own yearbook?  We thought so, so we put together a short tech note outlining the whole process, from shooting the video to adding the QR code to your yearbook.

Happy Halloween!! Got your Halloween clipart?

We want to wish all of you a great Halloween, and send a quick reminder to be extra careful when driving tonight!  The kids tonight are going to be focused on candy, and not road safety.  We all know how unpredictable they can become when they have sugar on their minds, so watch out!

Looking to spruce up your yearbook pages with some Halloween clipart?  Yearbooks Desktop allows you to import any clipart you find on the web.  Just download it, import it to your images section, and away you go!   Having trouble finding clipart?  Here are some suggestions:

Openclipart.org has a great selection of clipart.  Here is a sampling of their Halloween clipart selection!

CLKER.com – A clipart repository where all the images have been released by their author into the public domain. Similar to openclipart.org, CLKER offers a few extra choices to round things out. (Halloween clipart on CLKER)

Clipart.com claims to be the largest collection of royalty-free clipart offered by subscription on the Web.  They have a Halloween clipart section as well!

Have you found another great source for Halloween clipart?  We invite you to share it in the comments!

Themed banners are all the rage

Banners are easily becoming the most talked about new feature in Yearbooks Desktop.  If you don’t already know, banners are themed header and footer packages that can be added to your pages.

We offer several sets of banners.  Each set contains standard headers for grades, activities, field trips, autographs, etc, as well as matching footers.  A ‘Blank’ header is also available so you can insert your own page title.

Learn how to add banners using our online help videos!  Banners can be added to one page at a time, or they can be added to multiple pages using the auto flow banners function.

Change your banner theme at any time, and watch as all of your pages are updated with the new theme automatically.

Start with Importing Students

One of the first steps we face when creating a digital Yearbook is to import the student information into the program.  Once the data is loaded in, creating and organizing your pages is fairly easy, so we’ve posted some tips to assist you with your import.

Usually, photographers will provide you with a PSPA Photo CD, which is a CD that contains all of your student’;s pictures, and an index file that has been set up based on the industry standard.  This is a very common format in the industry, so don’t be afraid to ask your photgrapher for PSPA output.

Once you have your PSPA CD, importing it into Yearbooks Desktop is fairly straight forward, as is outlined in these step by step instructions on our support site.  Once your data has been imported, the program makes it very easy to correct spelling errors, adjust classes, and add or remove individual students.

But what happens if your photographer can not provide you with a PSPA CD?  Don’t worry, Yearbooks Desktop can import non-industry standard CD’s as well.  Just follow this handy guide from our support site, and you’ll have your non-PSPA data loaded in no time.

Remember, our team has been importing data into Yearbooks Desktop for years, so if you run in to a snag anywhere along the way, contact our friendly support team.

October is Fall Harvest Month

Autumn was also known as the harvest season in the earlier days. It is so because this season provides the ideal conditions for harvesting crops, fruits and vegetables. Wheat ripens during this season. In fact in most of North America, the famous harvest celebrations takes place during autumn.  Surprisingly, this overabundance of beauty can lead to unique challenges when it comes to snapping photos.  Here is an article that discusses some of these challenges, and suggests methods to overcome them.  Have a read through, to ensure that your photos look their best.

This has been a successful launch!

September is coming to and end, and we are reaching the end of our launch.  Yearbooks Desktop is more popular than ever this season, as people are excited about inexpensive alternatives for their yearbook solution.

We’ve been strengthening our support system daily, by adding tutorial videos, and help articles on our support page.  Watch for new content every Tuesday, Wednesday, and Thursday!

Are you following us on Twitter yet?  Did you know that you can launch support tickets from there, as well as facebook?  Whichever channel is most convenient for you, we’ll be there!

Do you recognize the header and footer used on this blog?  If not, you should learn about banners!  Learn about them in the help manual, or just try them out in the software!


New help articles have been added to our support site!

Instructions on how to move your pages around, as well as tips for working with two page spreads have been added to our support site!  The friendly support team at Northwestern Support Professionals is standing by to assist you with any questionDrag and Drop to move pagess you have about our software, and help you overcome and problems you encounter.  That’s why we invest so much time creating support forums, help documents, and tutorial videos to help you along your way.

Today’s featured articles?

New articles are added every few days!

Help videos posted for Yearbooks Desktop!

Two new help videos posted for Yearbooks Desktop!  Check them out right here, or head to the video page.

Having trouble registering the software?  Here’s a short walk through of the registration process. You’ll need to get a registration code from your publisher.

Do you need to add, remove, or change the location of your page number? Here’s a quick video that will show you how to do just that!

Keep in mind that some publishers do not allow you to change the position of the page number. You’ll know that is the case if you do not see a ‘Custom Footer’ button on your page ladder.

Do you have suggestions for additional tutorial videos that you’d like to see? Let us know!